K-2SO Eye Controller - Installation Guide
Installation guide for the K-2SO Animated Eye Controller module with servo-driven eye movement.
Related Product
K-2SO Animated Eye ControllerPrerequisites
- ✓K-2SO Animated Eye Controller kit
- ✓5V power supply
Tools & Materials Needed
- •Small Phillips screwdriver
Video Guide
Instructions
Step 1: Prepare the Eye Mechanism
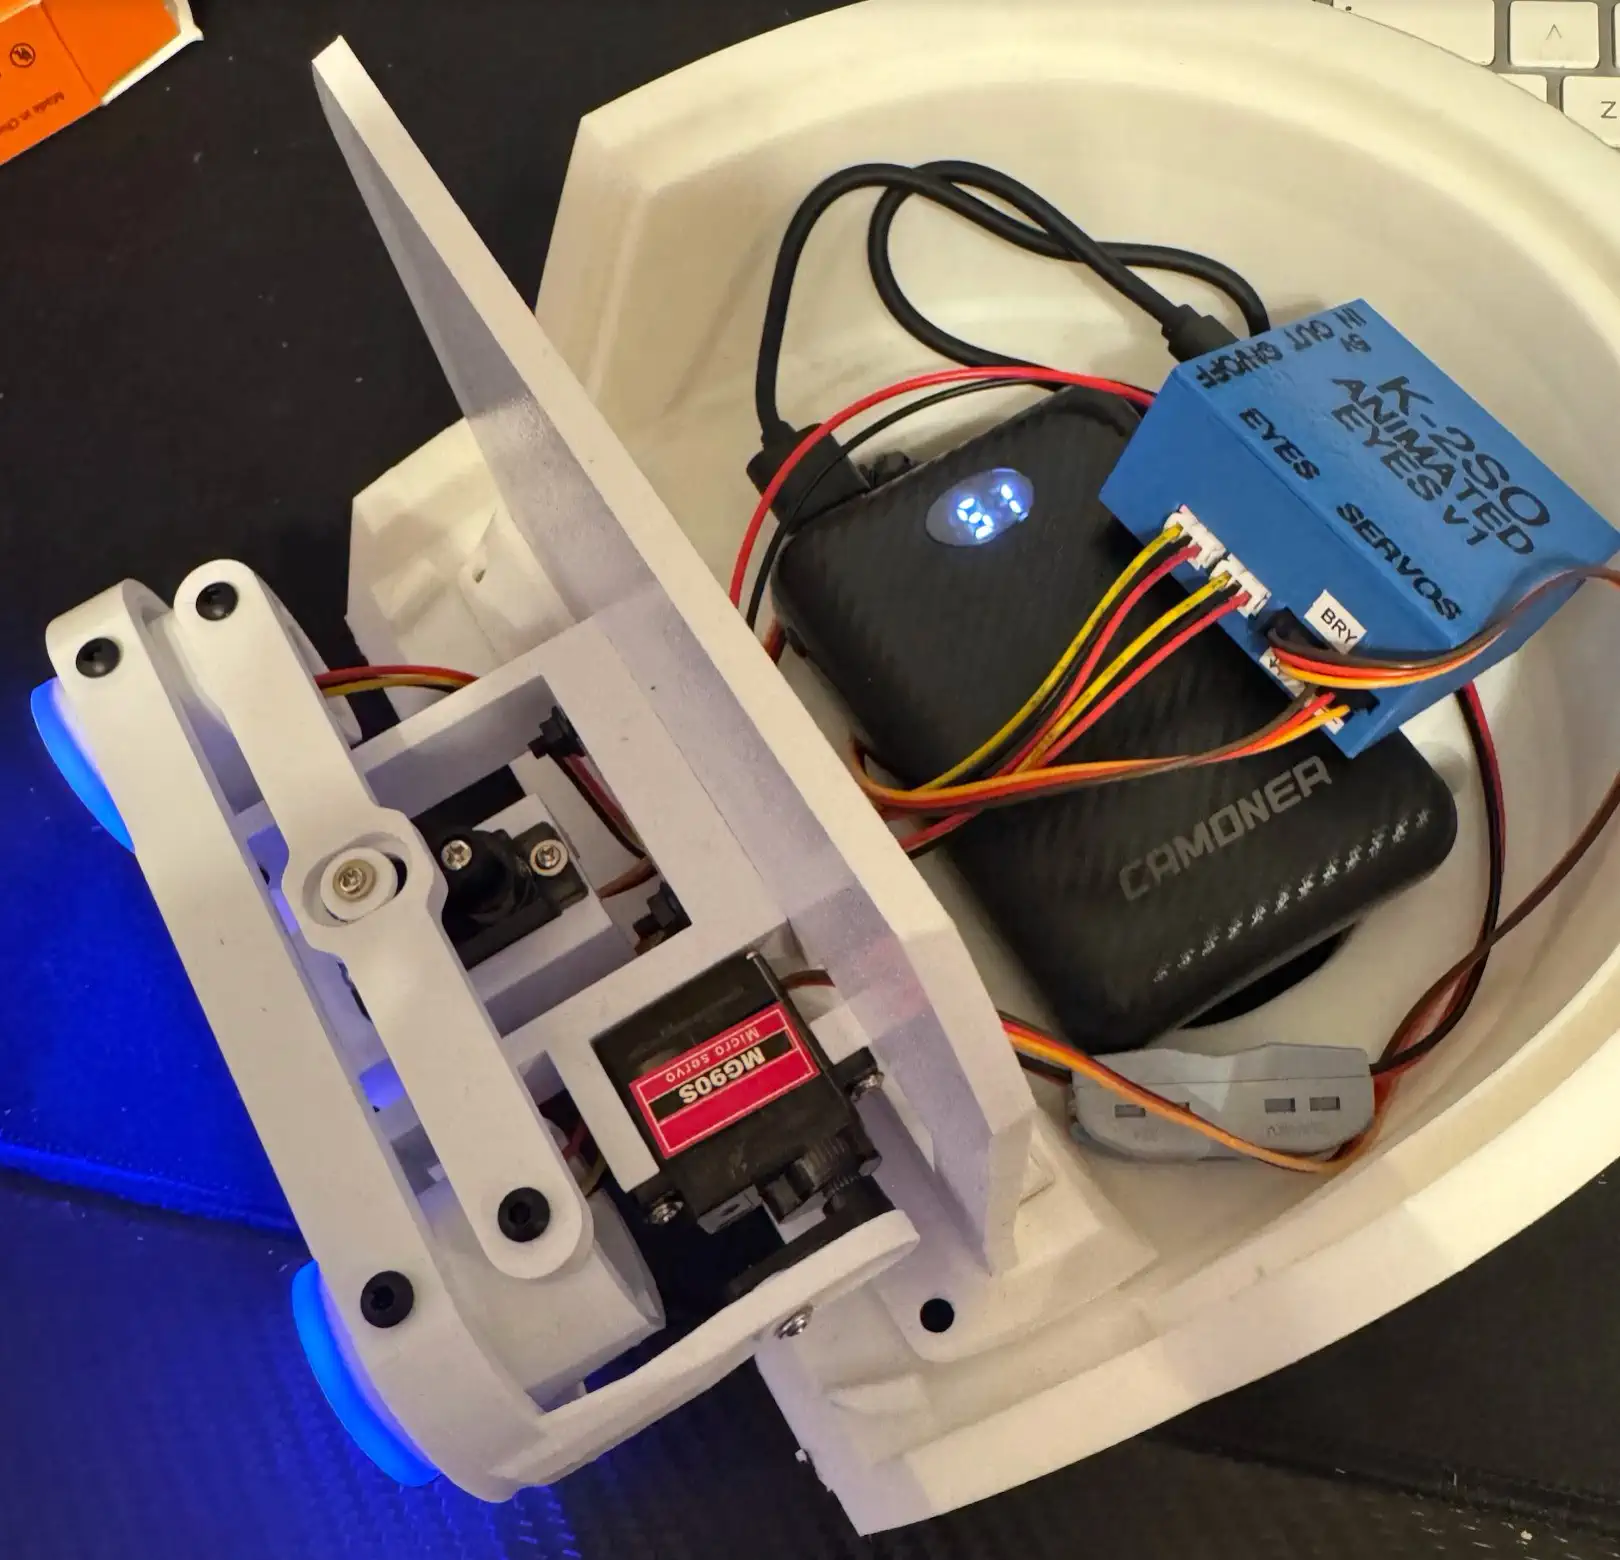
Inspect the eye controller PCB and servo assembly. Attach the servo horn to the micro servo and test-fit into the K-2SO head cavity. The servo should move freely without contacting any internal surfaces.
Step 2: Mount the Controller Board
Secure the eye controller PCB inside the head using the included mounting tape or screws. Position it where the wiring can reach both the servo and the power supply connection point.
Step 3: Connect the Servo
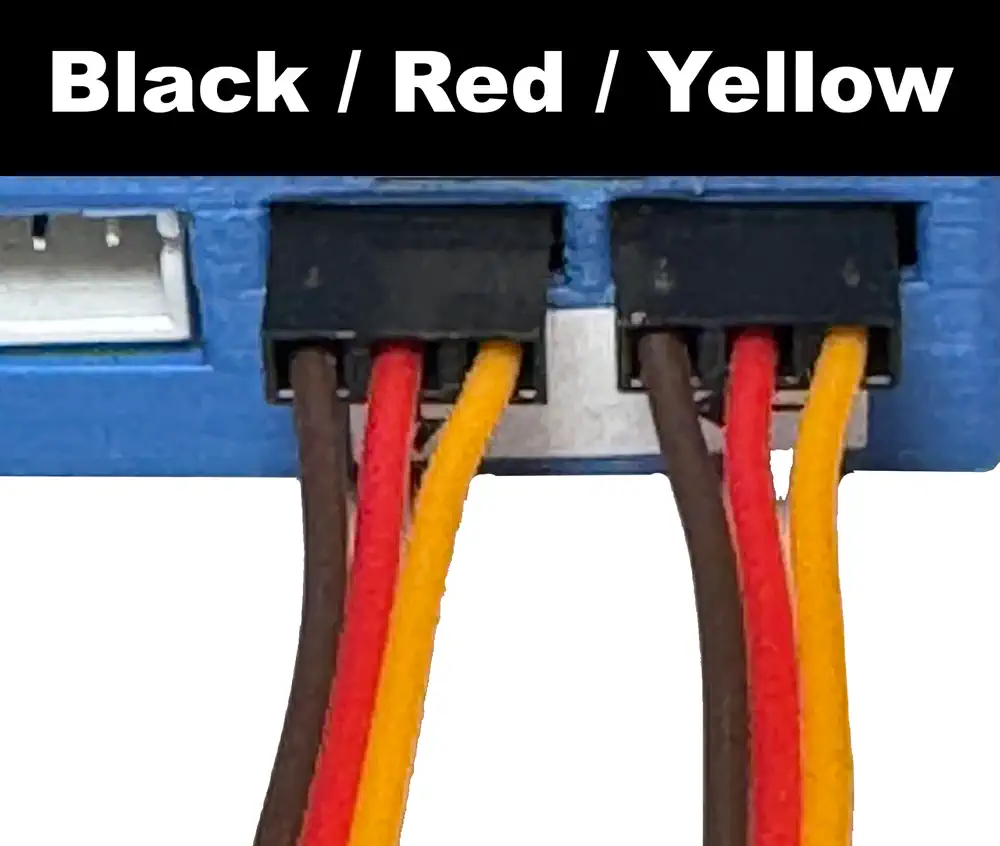
Plug the servo connector into the designated header on the controller board. Ensure the wire colors match the pinout markings — signal (orange/white), power (red), ground (brown/black).
Step 4: Wire Power Supply
Connect the 5V power supply leads to the VIN and GND pads on the controller. The controller regulates power for both the LED eyes and the servo motor from this single input.
Step 5: Calibrate and Test
Power on the controller and observe the eye animation cycle. The eyes should smoothly pan and illuminate. Use the onboard trim pot to adjust the eye movement range if needed.
Step Images
Related Product
This guide covers installation for the following product:
K-2SO Animated Eye Controller→