K-2SO build by Josh Highland
K-2SOBuild Notes
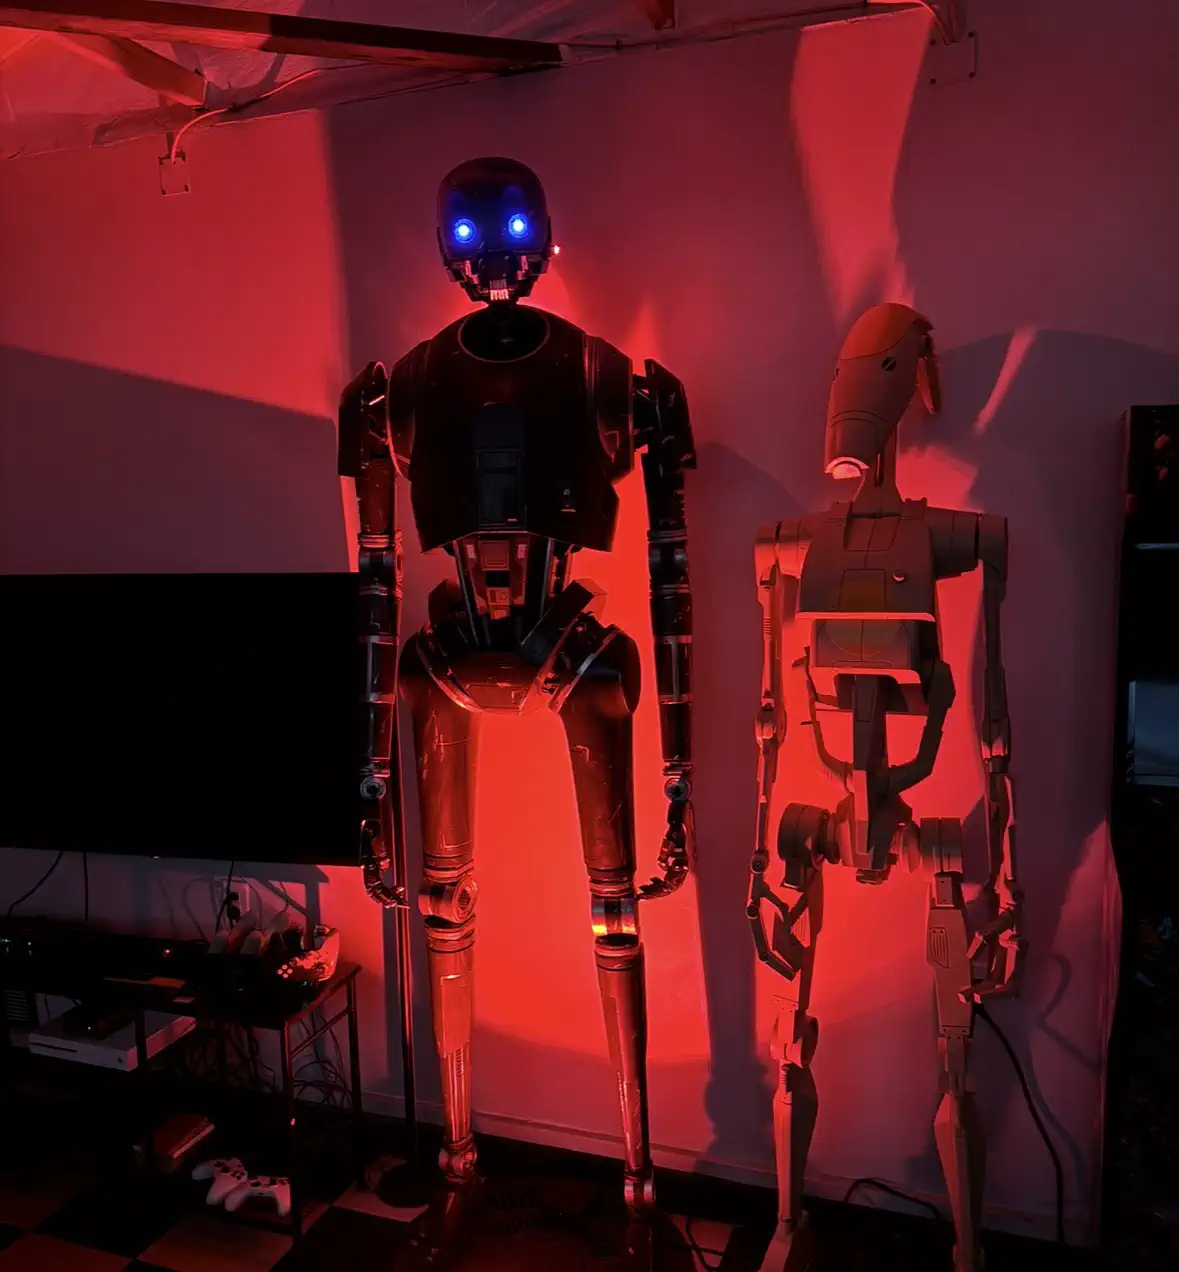
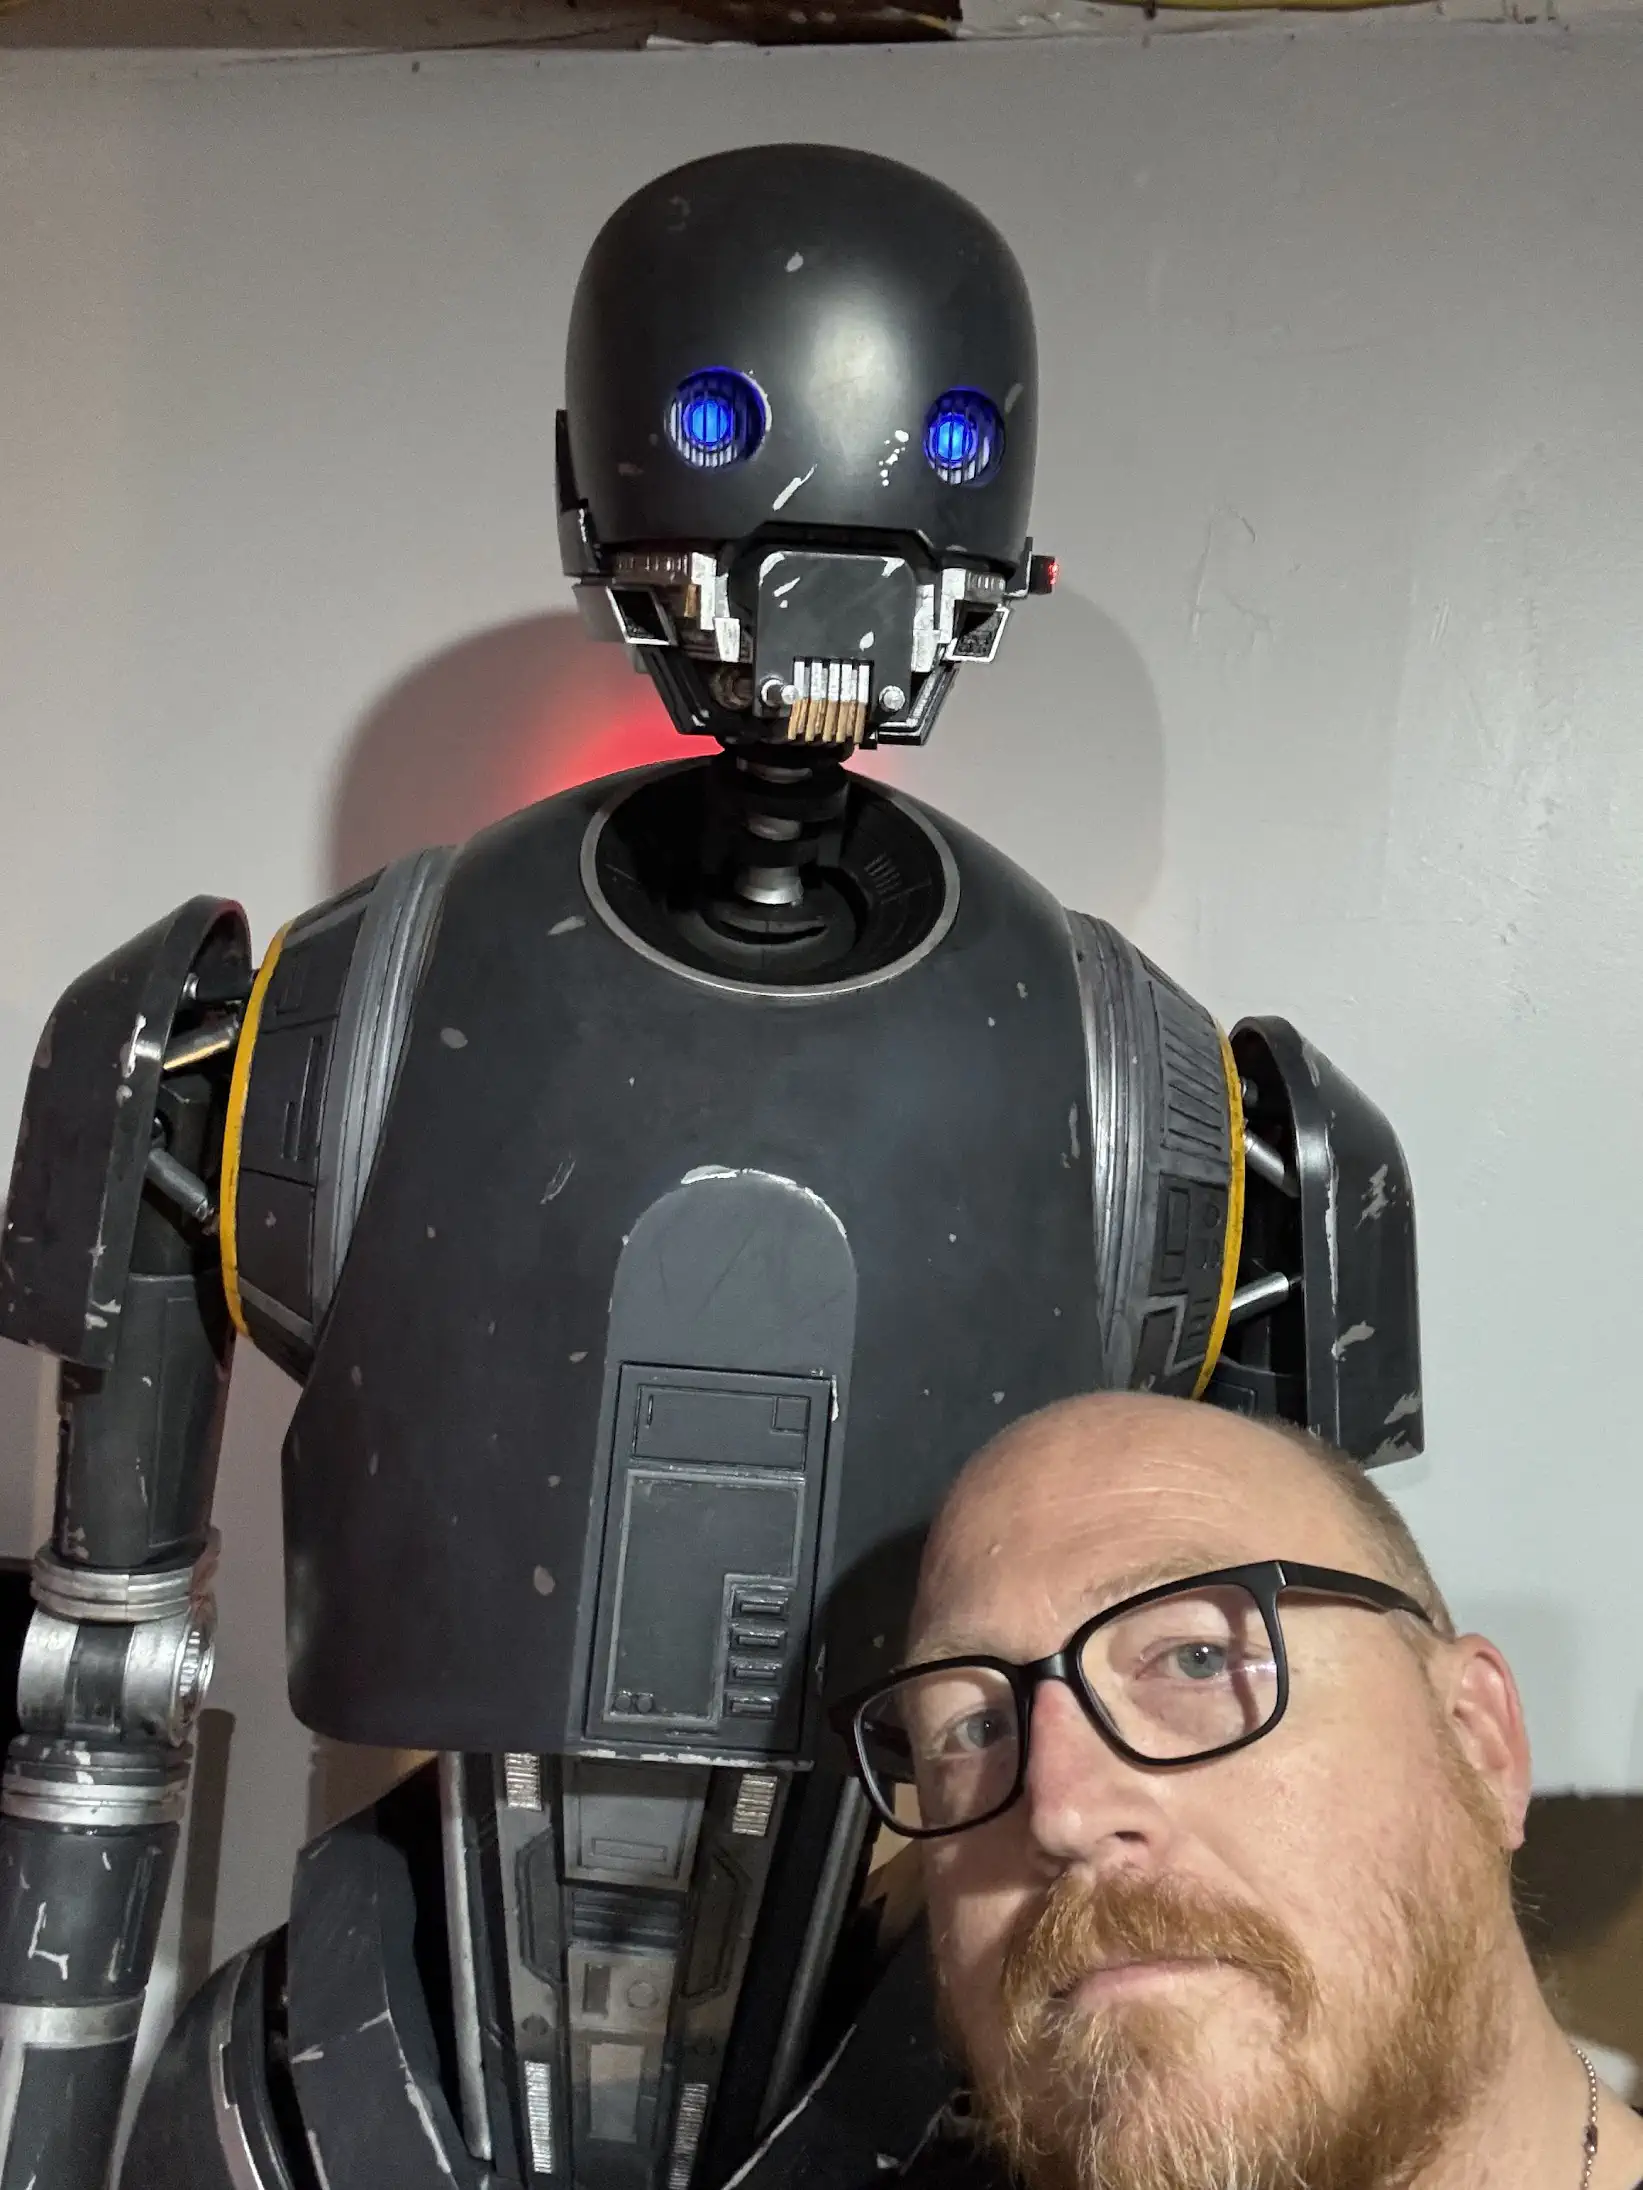
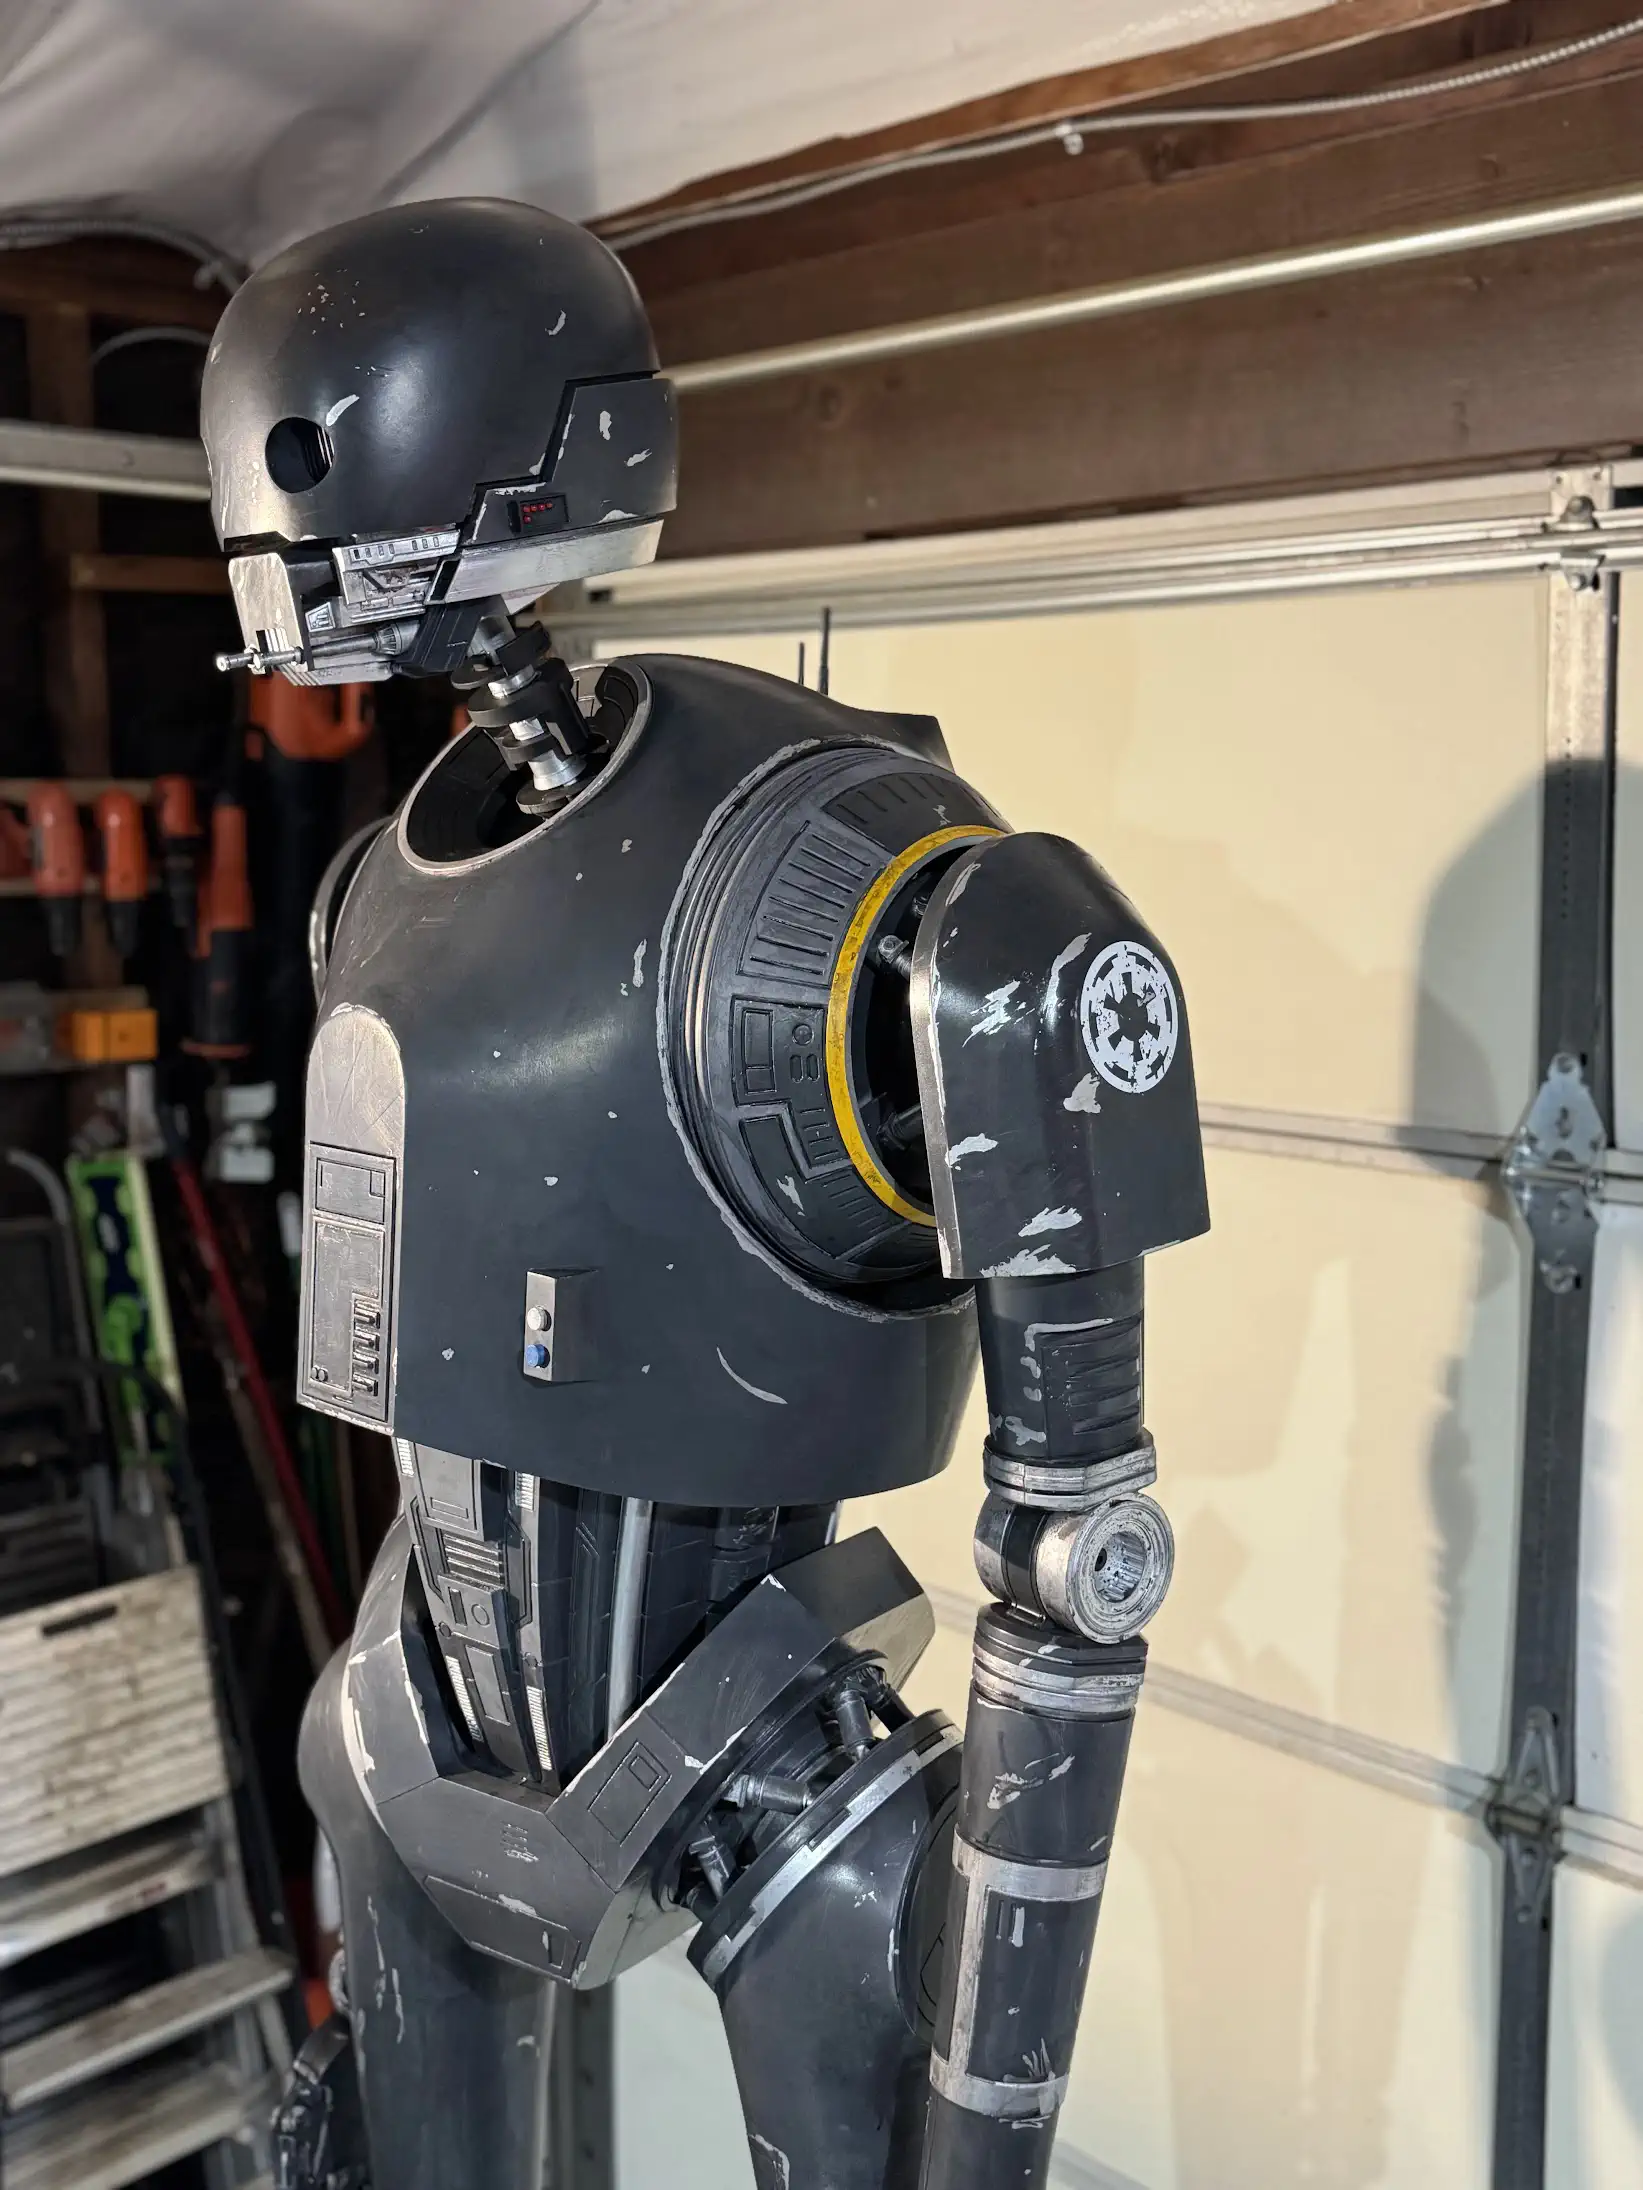
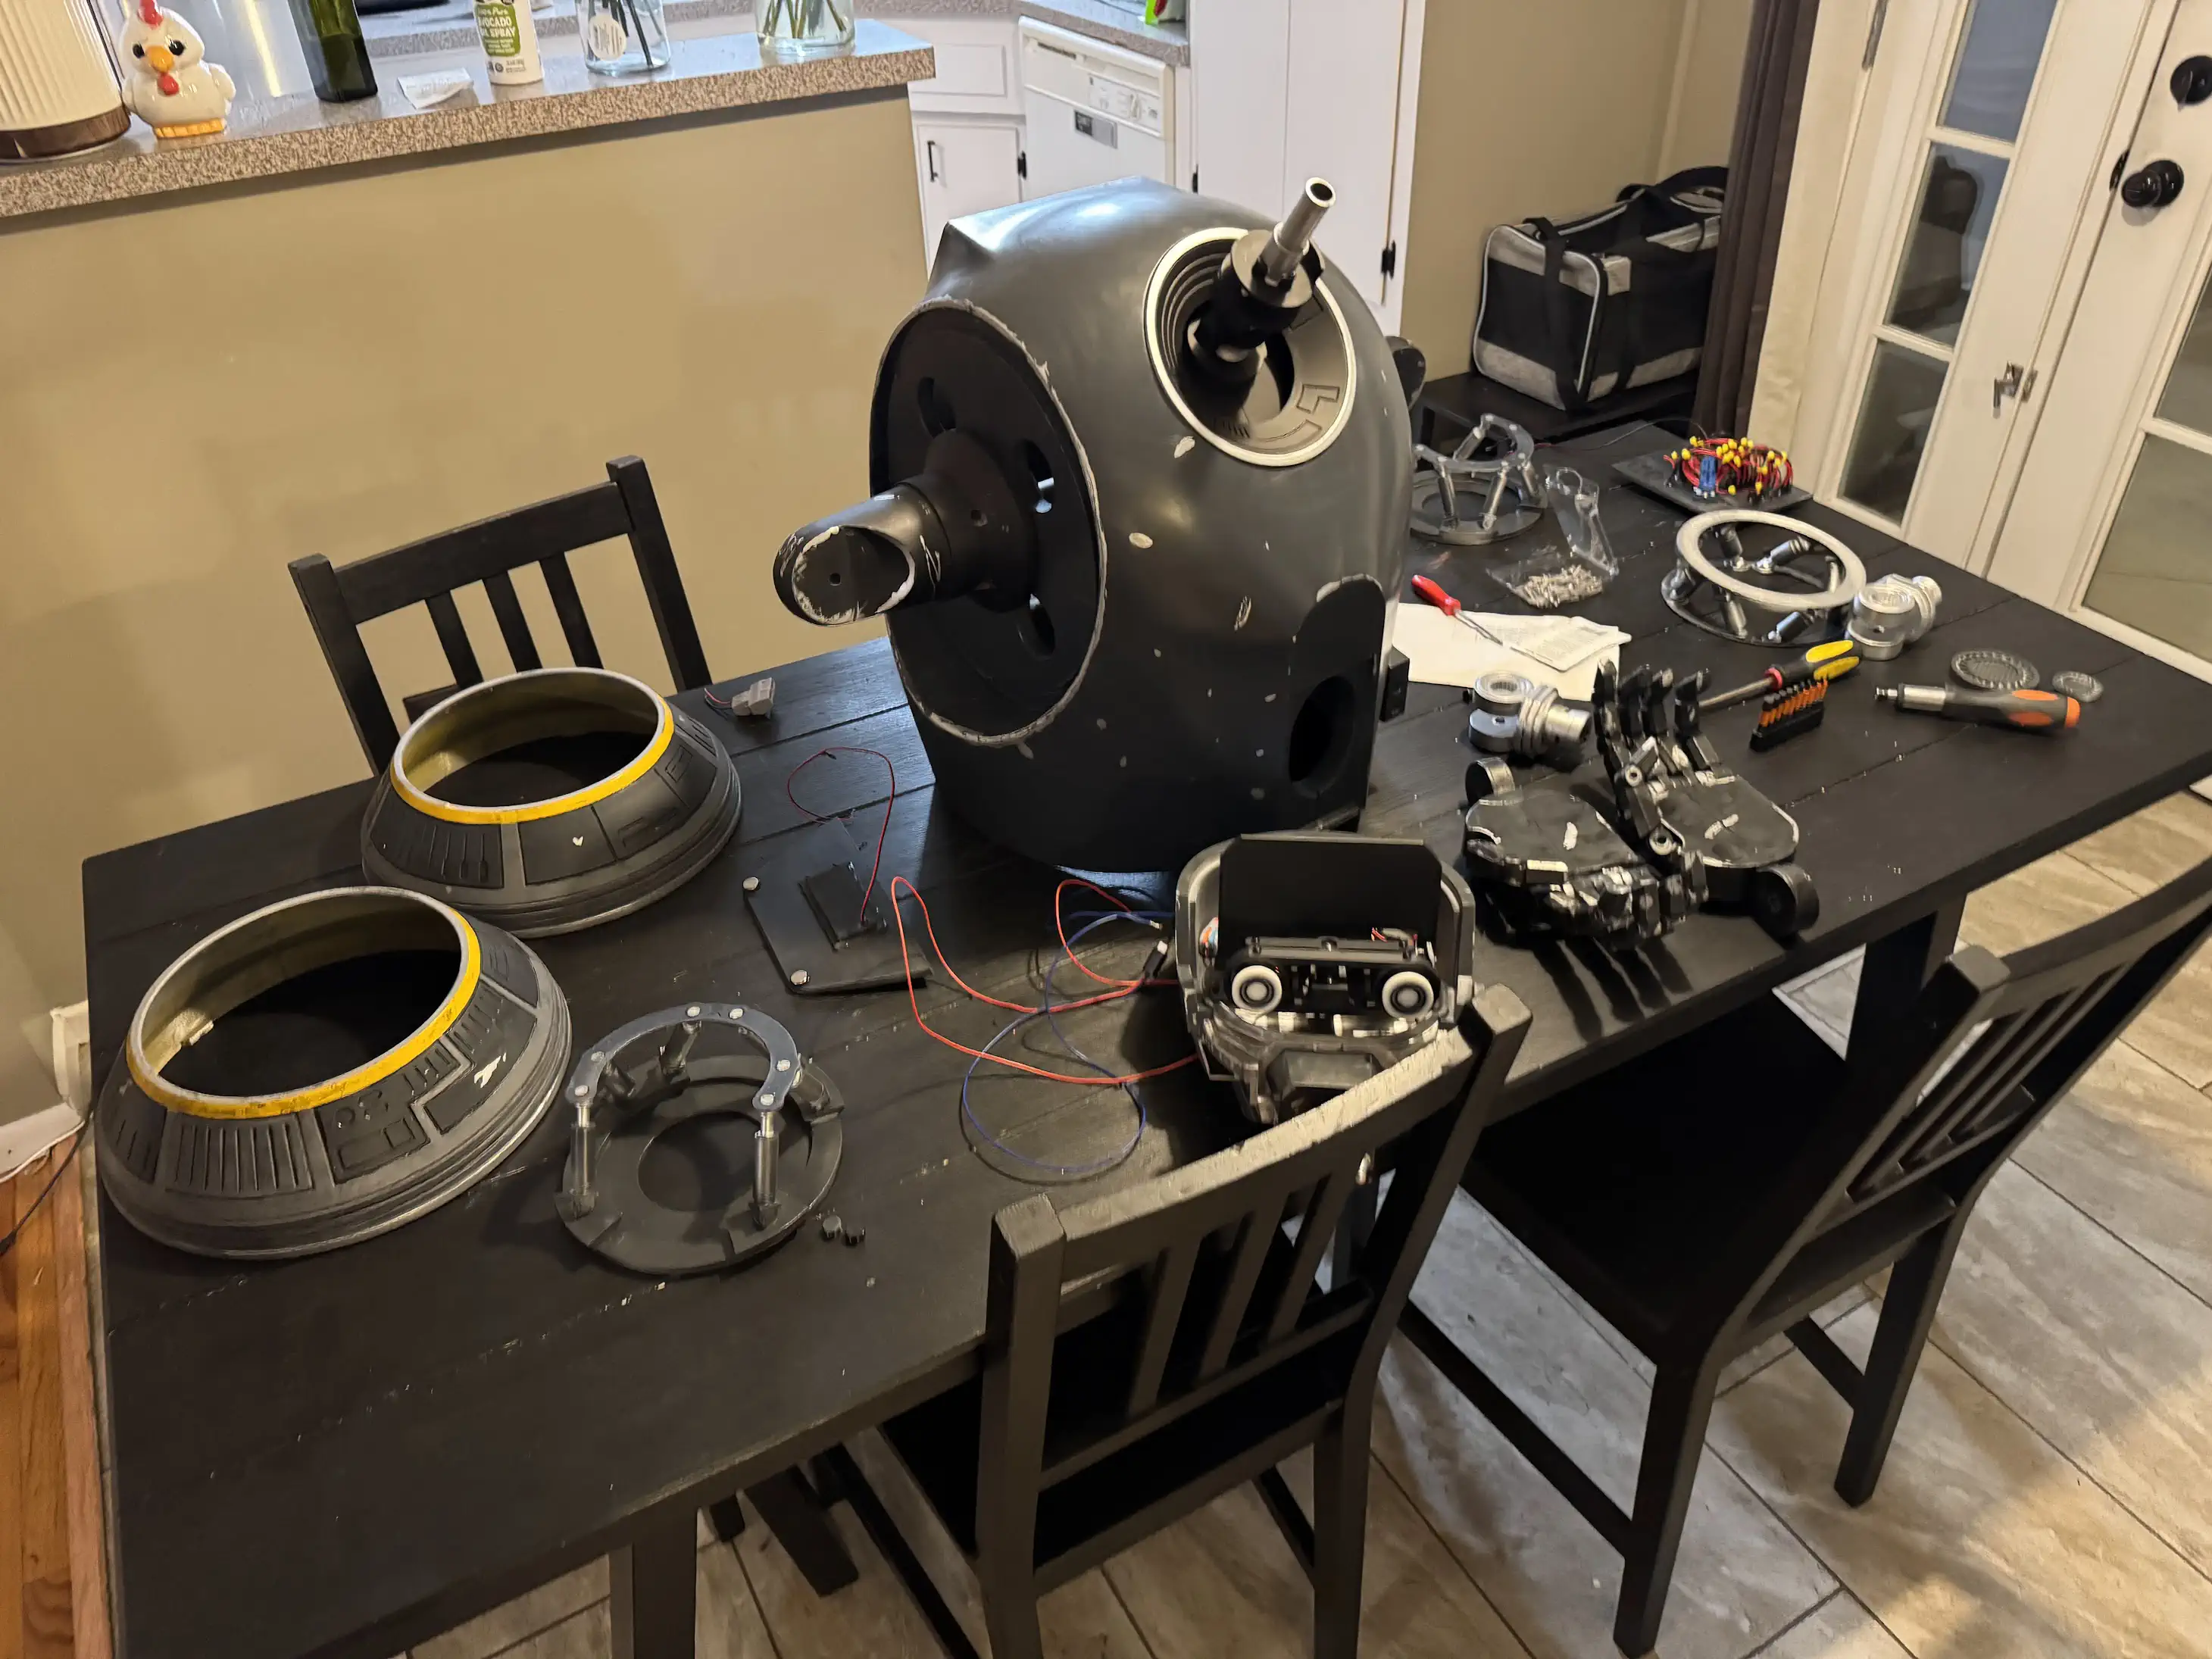
K-2SO Full-Size Build
After many months of printing, sanding, wiring, painting, and assembly, my 1:1 scale K-2SO build is finally complete. This project was built using the Droid Division files and incorporates several custom electronics, lighting systems, and builder-focused upgrades designed to improve realism, reliability, and ease of maintenance.
Printing and Finishing
The entire droid was printed in PETG. PETG provided better durability and heat resistance than PLA.
Surface finishing followed a multi-stage process:
- Acetone wipe-down to soften print lines and improve filler adhesion
- Bondo 907 glazing putty for seam filling and print defect correction
- UPOL filler primer for high-build surface preparation
- Progressive sanding through 220, 600, and 800 grit
The goal was not a perfectly smooth “automotive” finish, but rather a screen-inspired industrial appearance that retained subtle texture while eliminating visible print artifacts.
Paint Scheme
After testing numerous colors and comparing them against reference photos from Rogue One and convention displays, I settled on the following Rust-Oleum colors:
Main Body
This became the primary body color and closely matched the dark charcoal appearance seen on screen.
Accent Gray
Used on selected mechanical details and contrast areas.
Metallic Components / Base
Applied to exposed mechanical surfaces, joints, and wear areas.
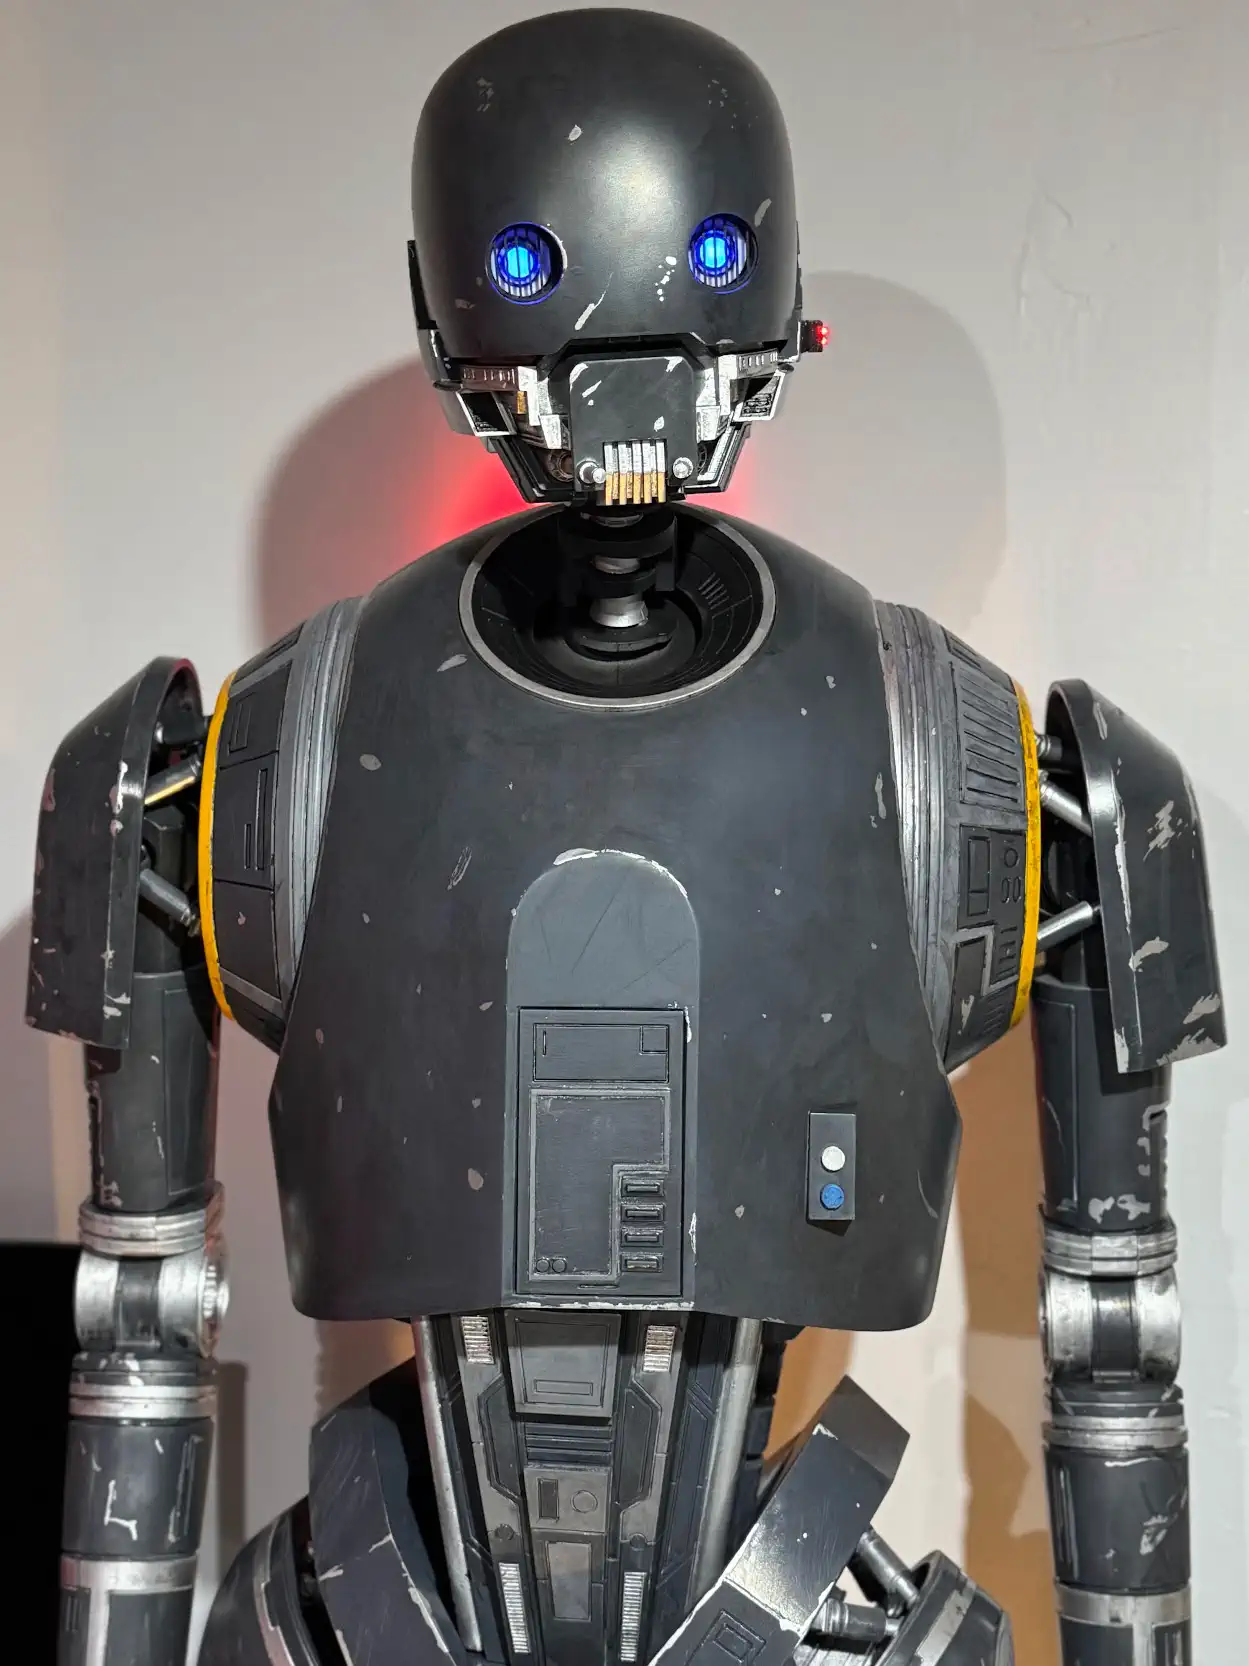
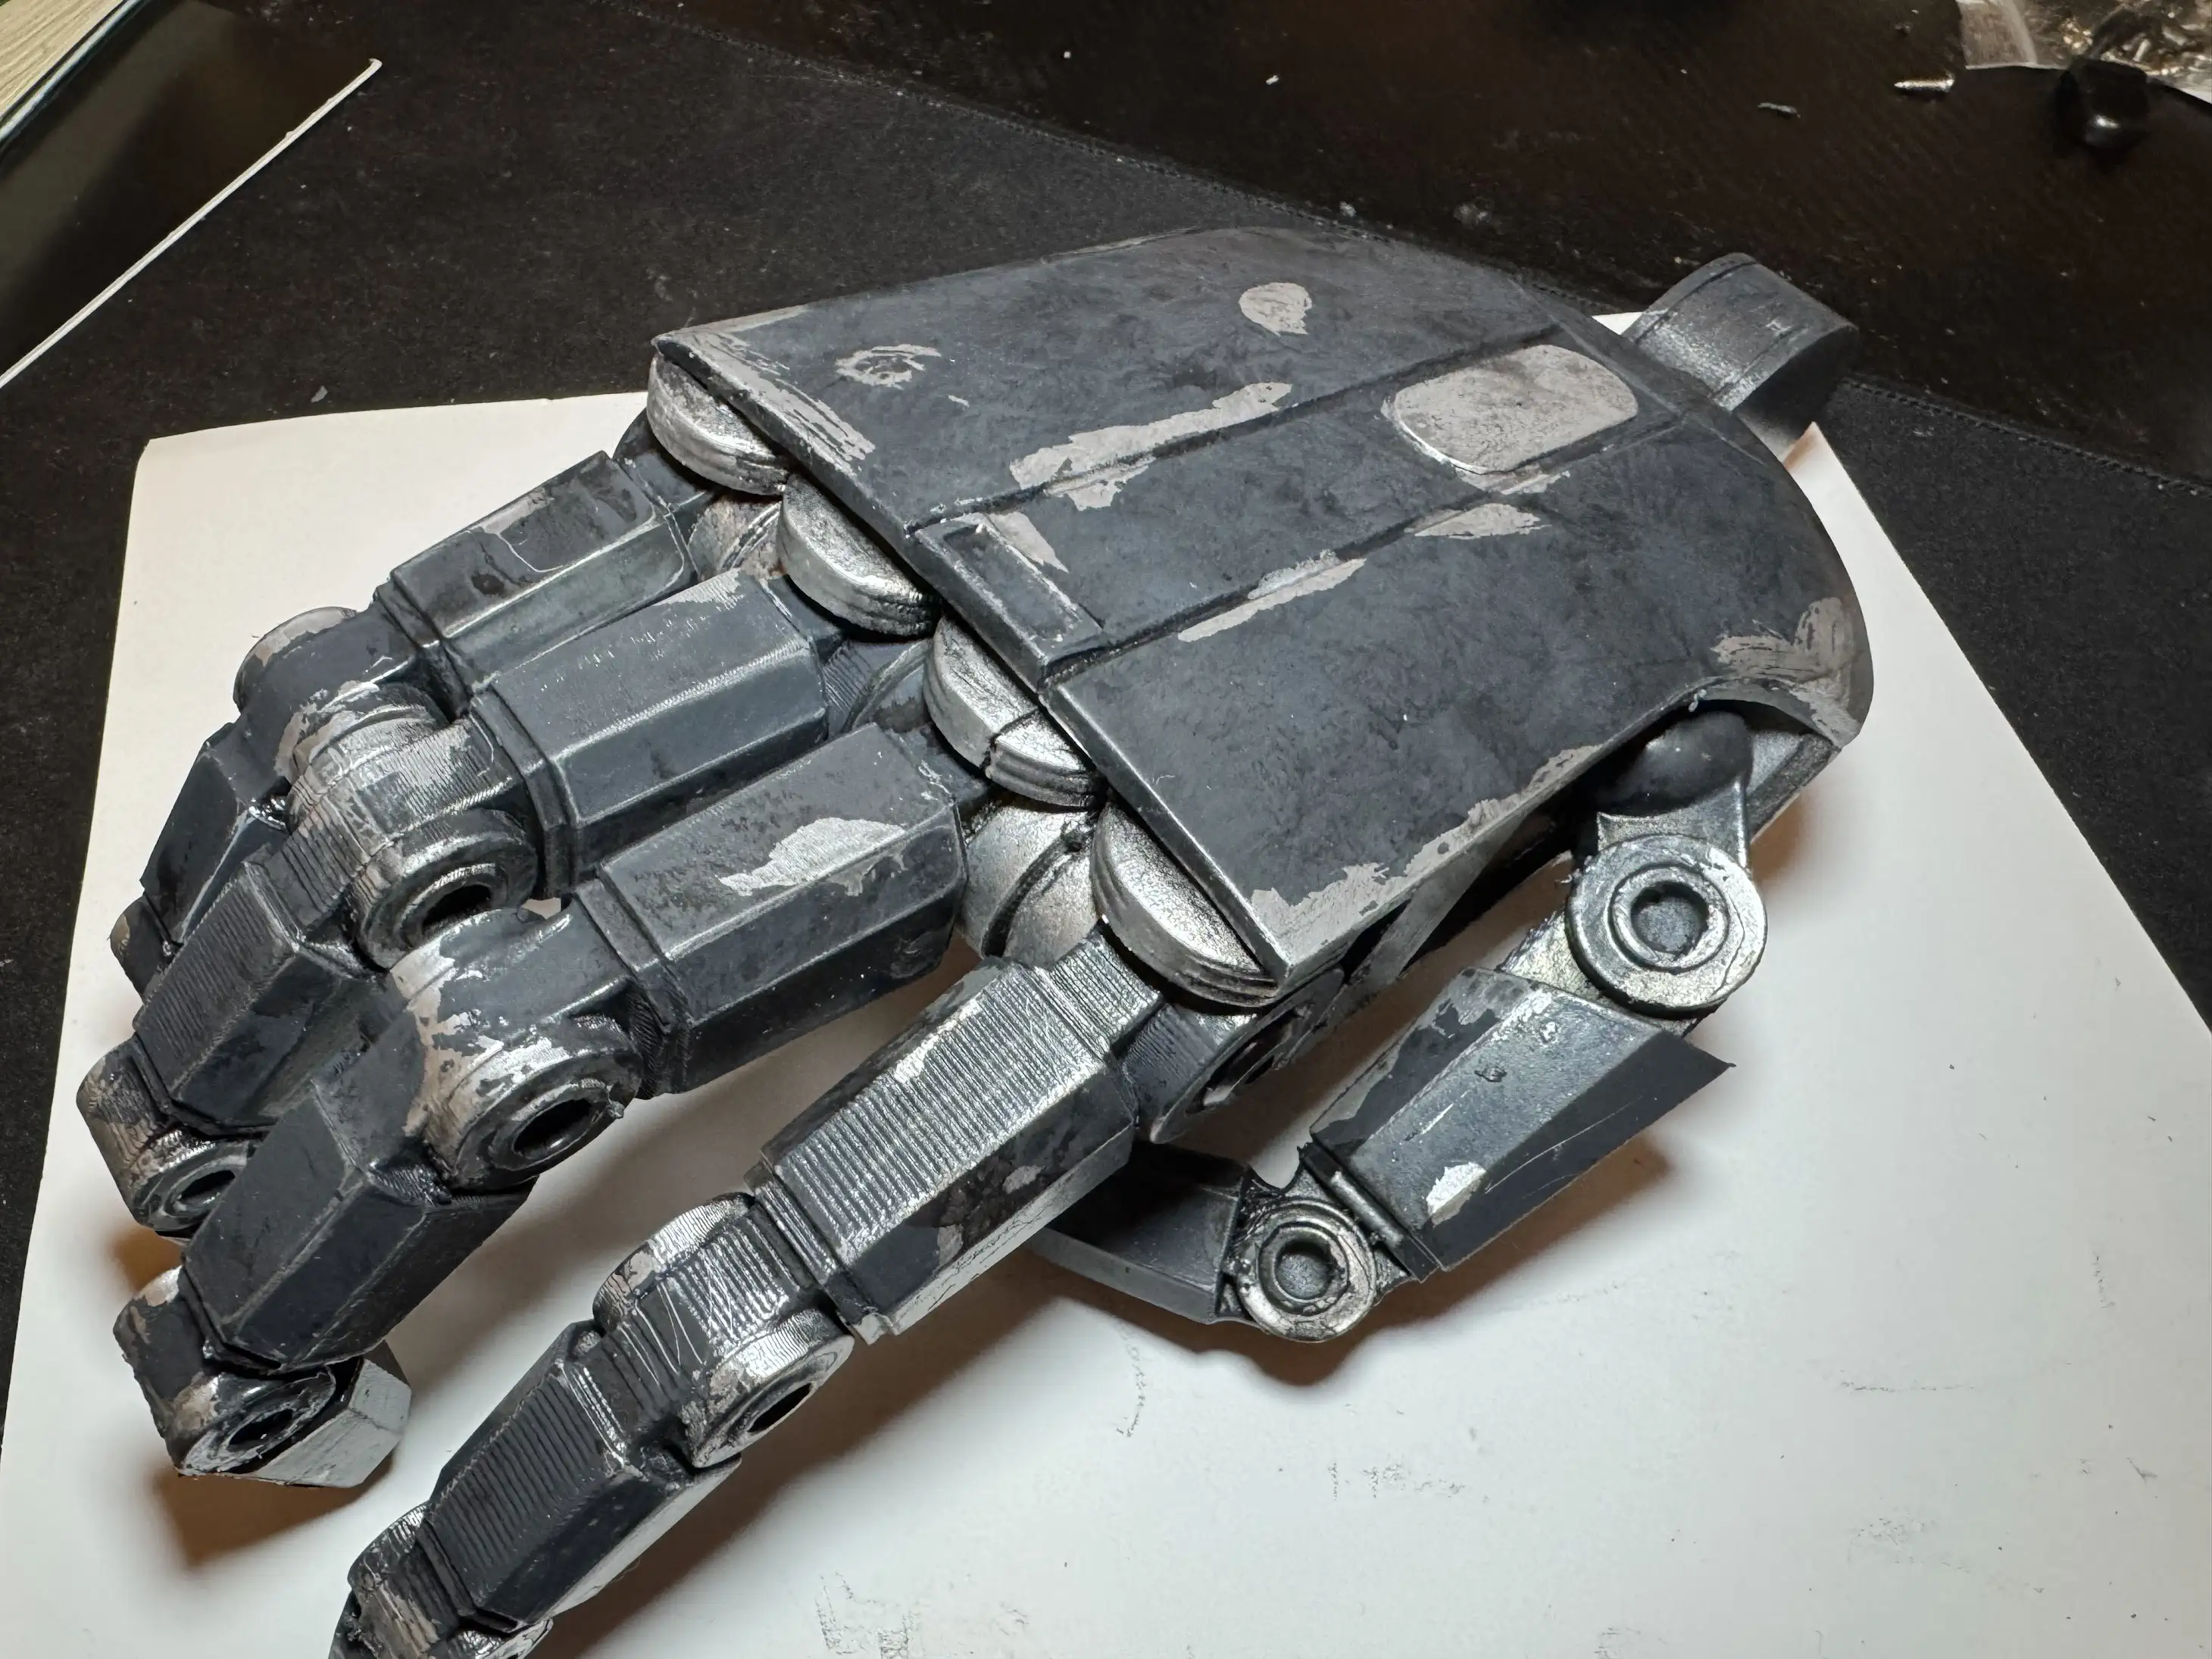
Weathering and Highlight Areas
I applied the liquid mast over the chrome paint in the areas I wanted to show up as scratches. I painted over the top, then rubbed the mask off. After that I applied a paint/water was over the pieces, focuing on areas dirt would collect. I let it sit for a few minutes then wiped it off. The photo of the hands is a good example of this.
Yellow Markings
I Used this for the shoulder rings
I painted the ring assembly 2 colors of gray
- Outer rings in the lighter gray
- Inner rings in the darker gray
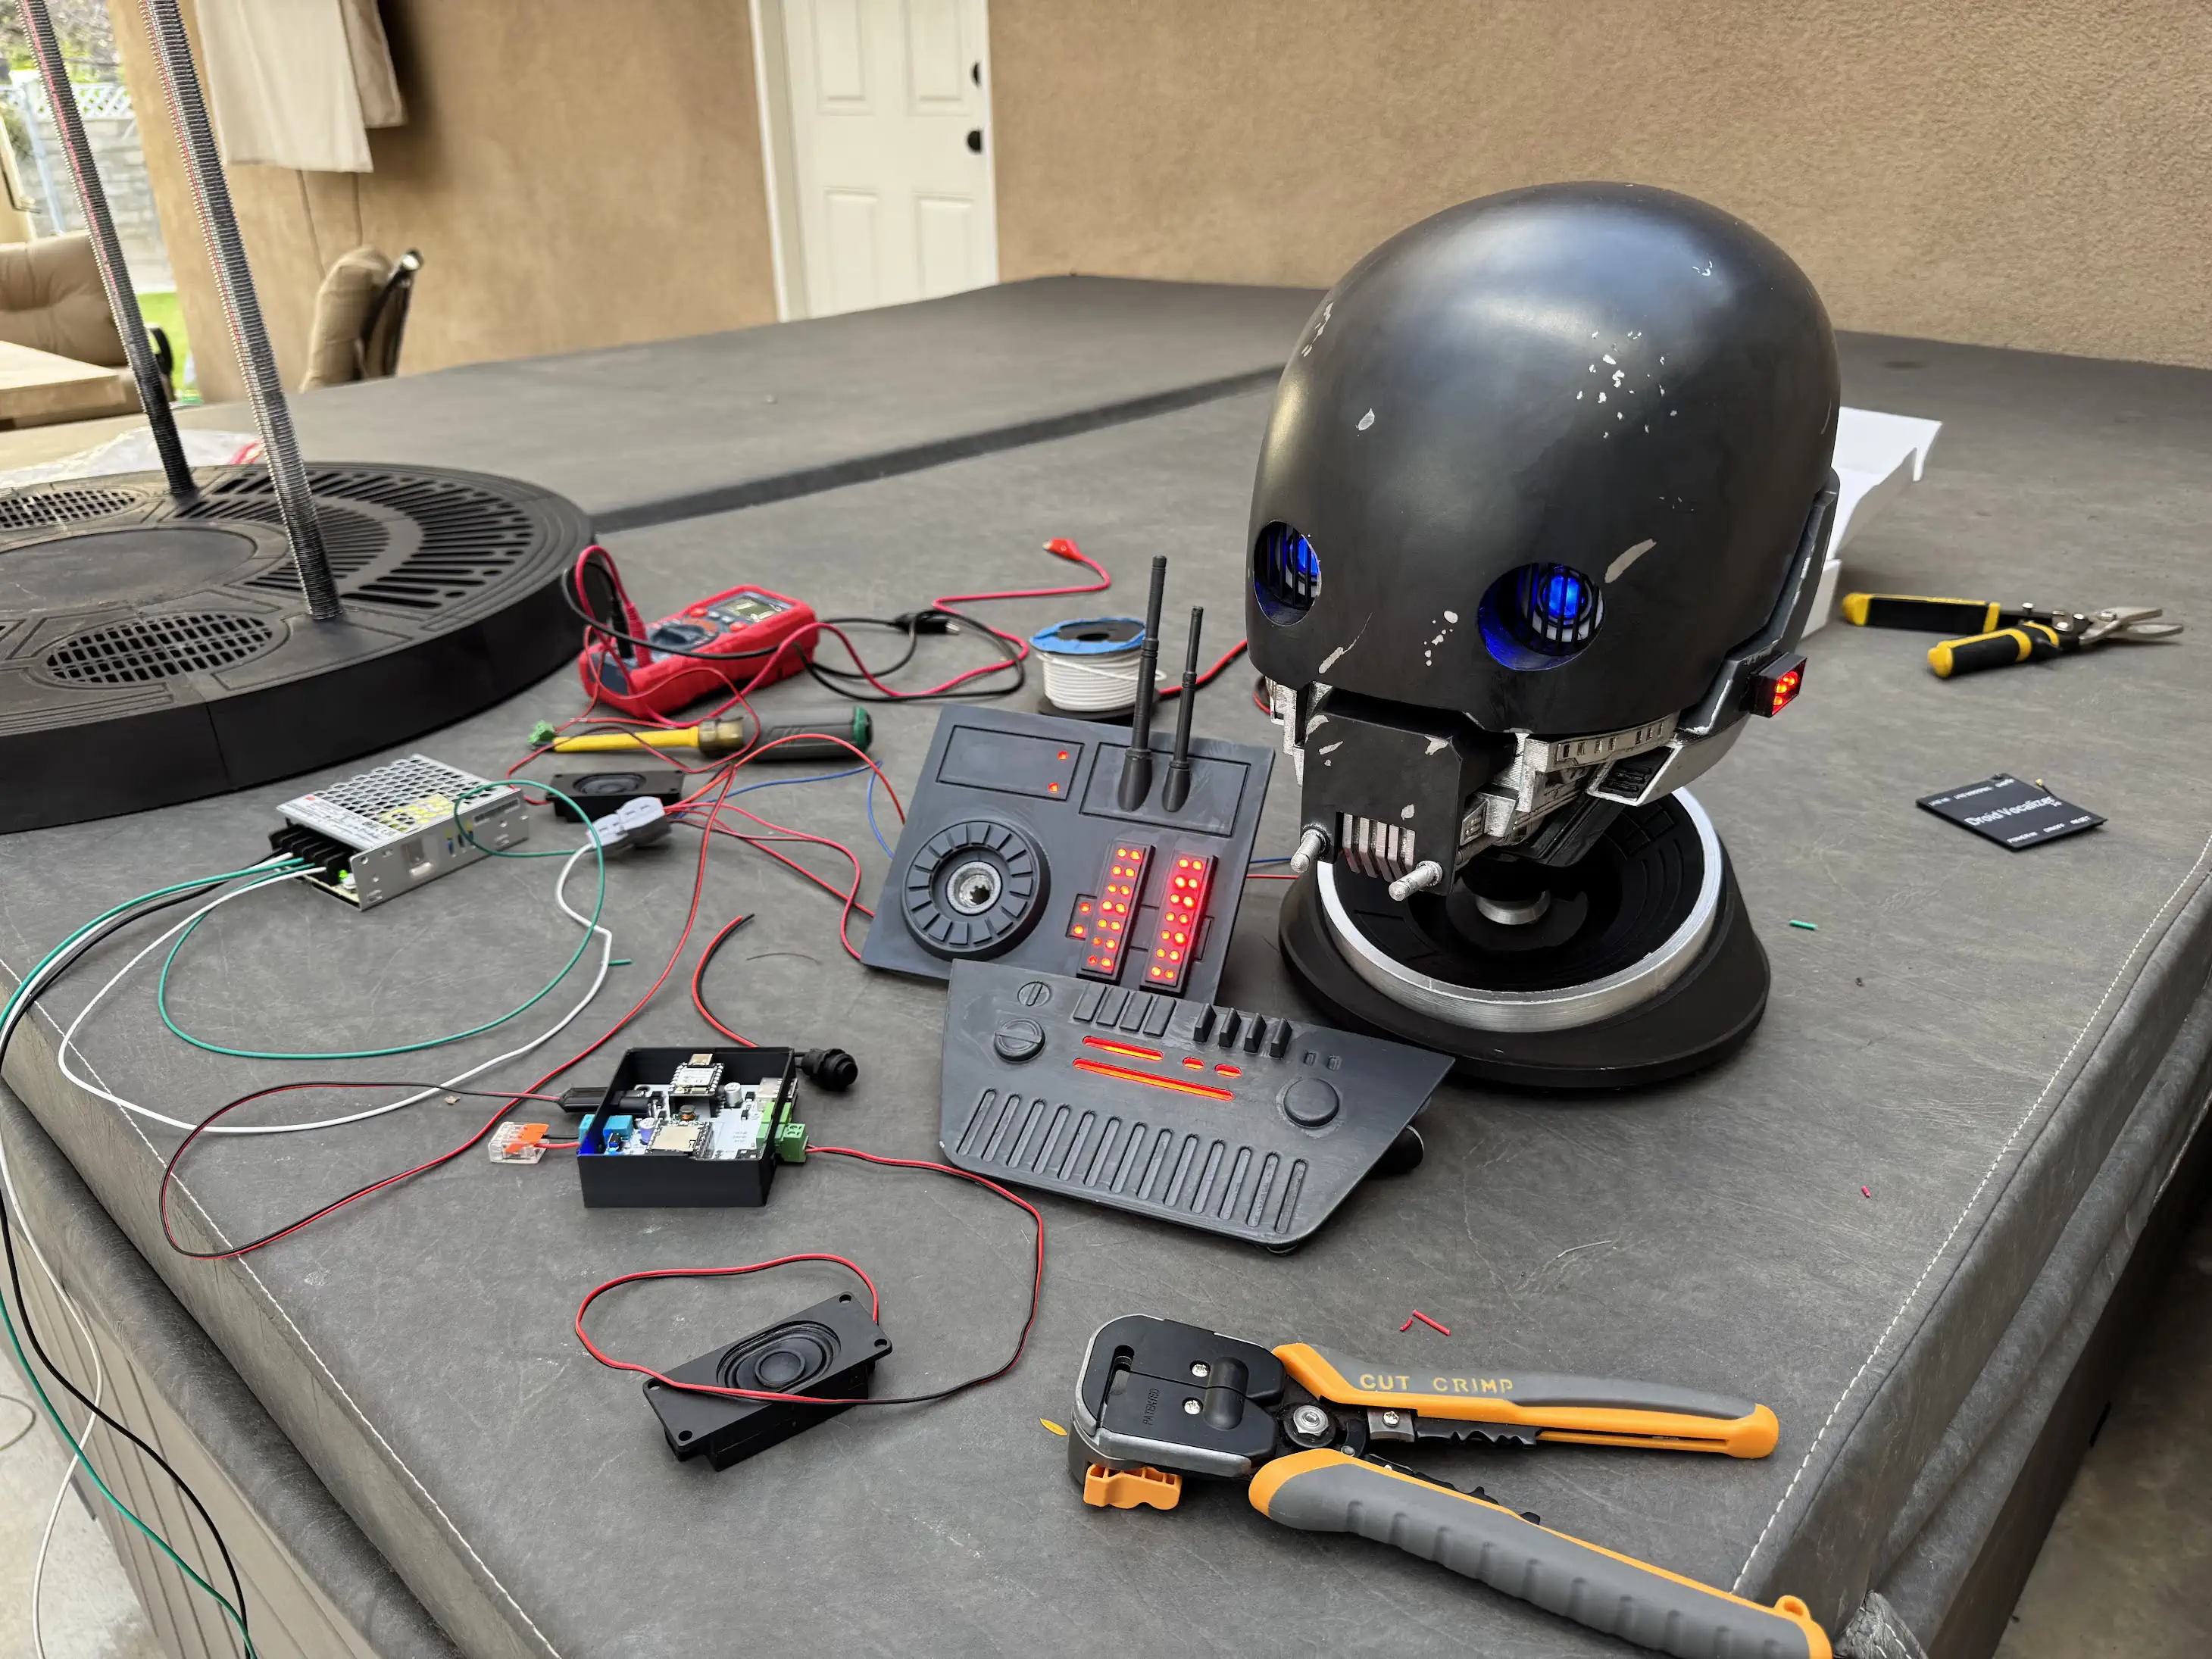
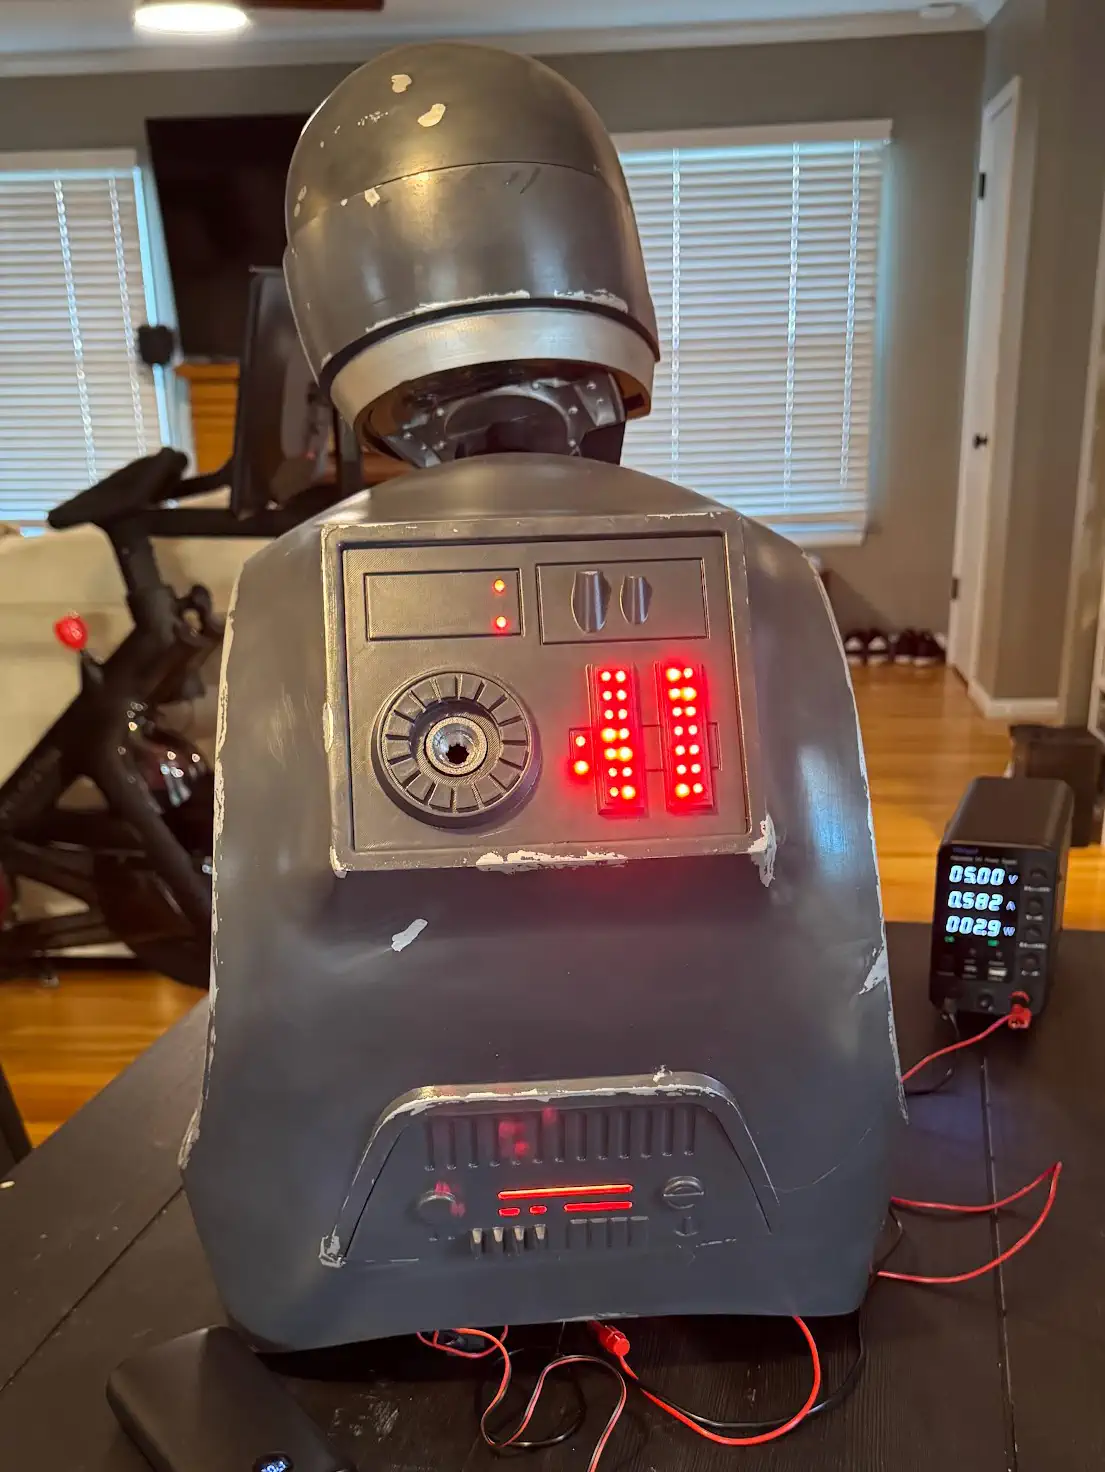
Electronics
Eyes
Head
Back Lighting
Vocalizer
Power System
Rather than using batteries, I chose a fully wired AC-powered configuration.
Power enters through the leg and routes internally to the torso where a Mean Well LRS-50-5 power supply distributes regulated 5V power to all electronics.
Advantages of this setup include:
- Unlimited runtime
- No battery maintenance
- No charging requirements
- Stable voltage for LEDs, servos, and audio systems
Control Panel
All primary controls are hidden beneath the torso lip.
I added some switches to the base. One controls the LED uplight, the other provides power to all the other electronics in the droid
Lessons Learned
If I were starting over, I would:
- Plan electronics earlier in the build
- Join / glue all parts together before smoothing prints
Final Thoughts
Im super happy with how this build came out. Its crazy how big he is!
Photos
Electronics Used
Paints Used
Weathering Notes
Dry brushing with silver acrylic for edge wear